Final Product What You'll Be Creating

Step 1
Create a new document, any size. I used 800x600px. Fill the background layer with black. After that, place your photo in the center of the document.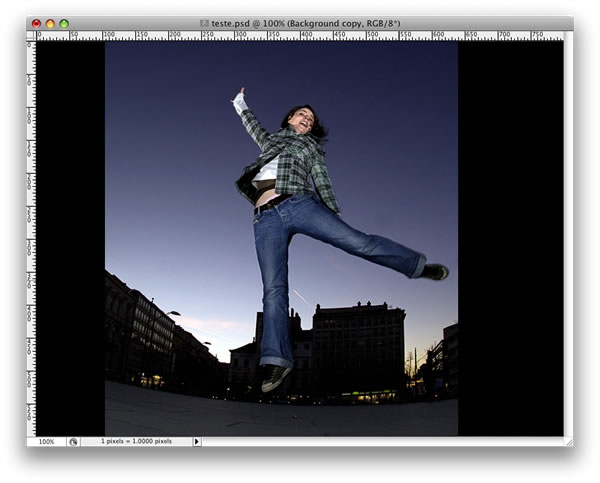
Step 2
Select the Polygonal Lasso Tool (L) and select the girl. When you complete the selection process, go to Select > Refine Edge. A dialog box will open with some settings. Select to preview the image on black, and make some adjustments until you find a nice result. Add a bit of feather, radius, and expand the selection. Then press OK.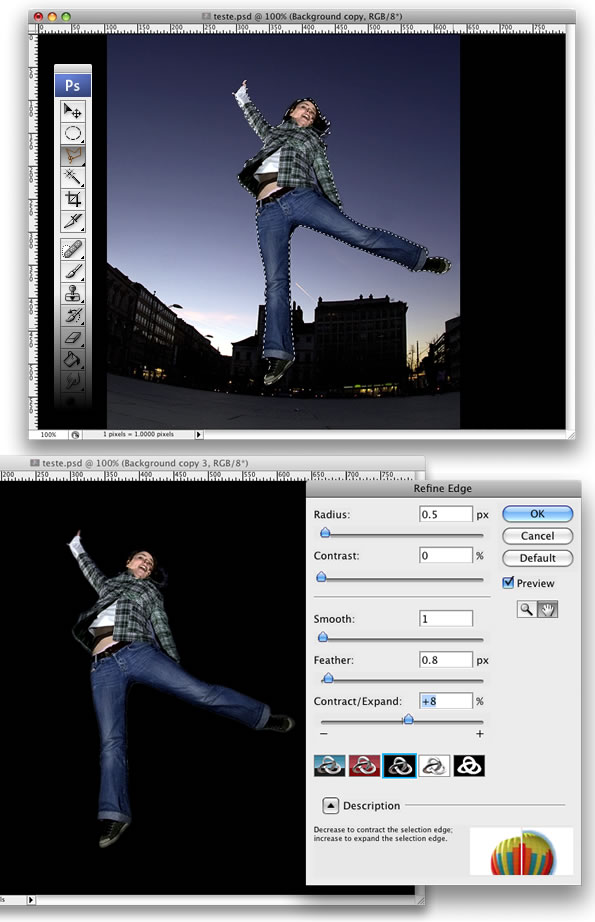
Step 3
Invert the selection, Select > Inverse and delete the background of the photo. After that, go to Filter > Sharpen > Sharpen and the Filter > Noise > Add Noise. Set 2% for the noise amount.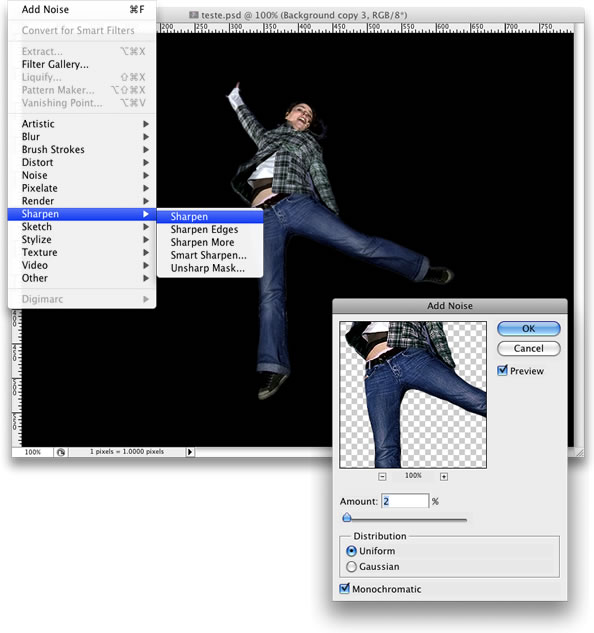
Step 4 - Breaking Apart
With the Lasso Tool (L), select the girl’s leg like I did, then go to Layer > Layer Mask > Reveal All. After that, select the Paint Bucket Tool (G) and fill the selection with black. Make sure that you paint the selection.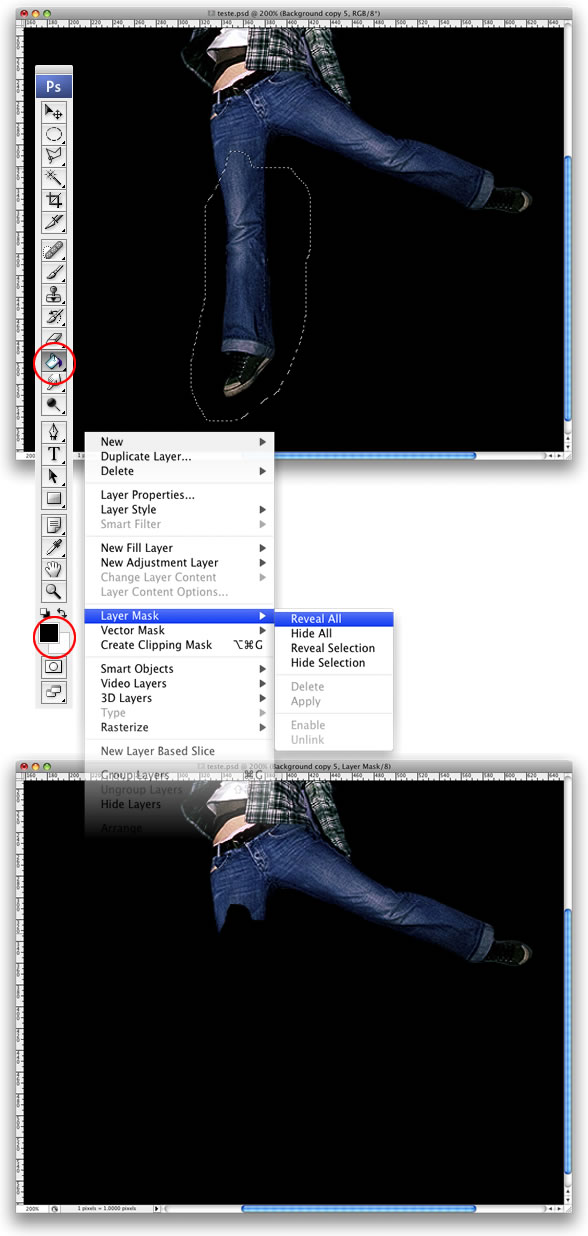
Step 5
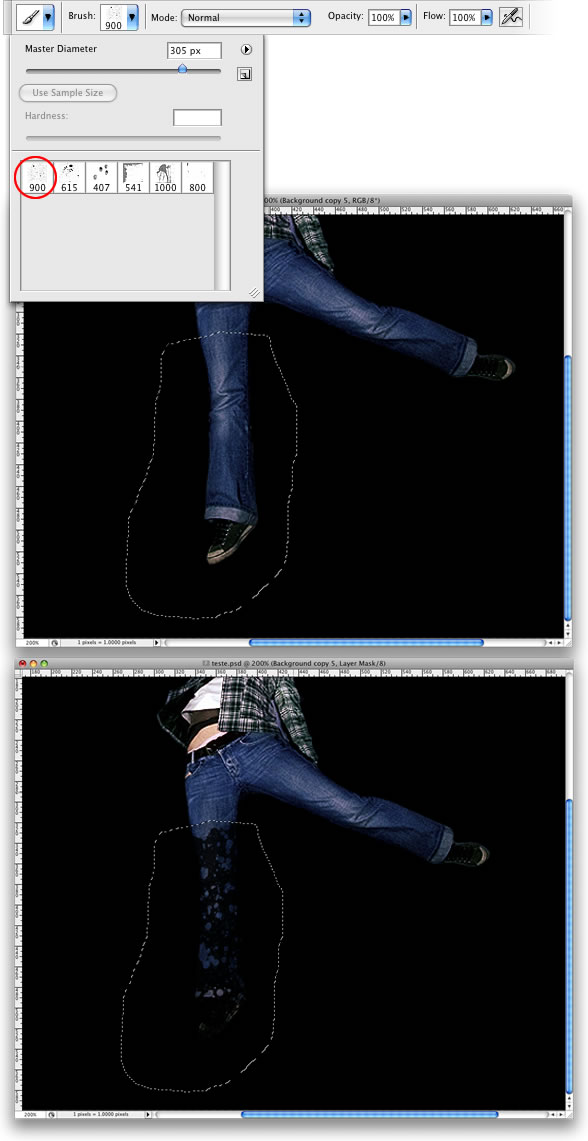
Here we will need some brushes. You can find good brushes at brusheezy.com. I used a set of brushes called Blood-grunge.Select the Brush Tool (B) and white for the color. Pick one of the brushes. I used the first one of the set and reduce its size to 300 or less. After that, start painting the hidden leg. You will need just a few clicks with the brush tool to get a good result.
Step 6
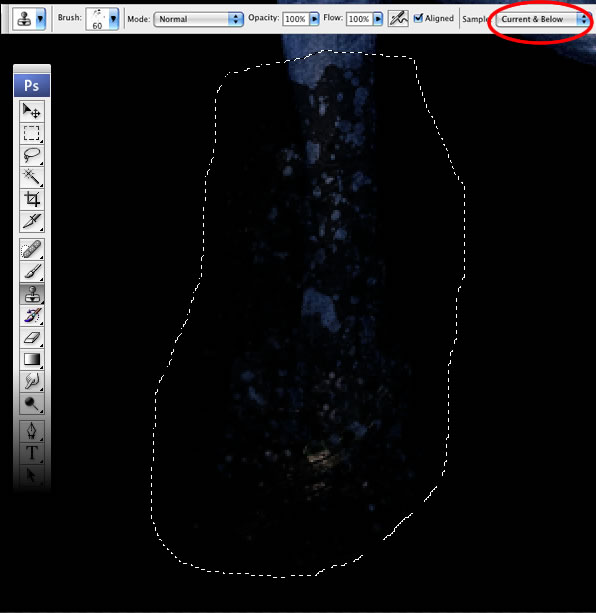
The previous step broke apart the leg, but the shatters didn’t spread like a real explosion. So in order to do that, we will use the Clone Stamp Tool (S).Create a new layer above the girl’s layer and select the Clone Stamp Tool. Choose Current & Below in the Sample settings. If you have never used the Clone Tool before, the first thing to do is define a source point. To do that hold the Alt key and select the source point. After that, start cloning some parts of the exploded leg to spread the shatters. The last thing here is go to Filter > Sharpen > Sharpen.
Step 7
Repeat the Steps 4, 5, and 6, but select the arm this time to break apart.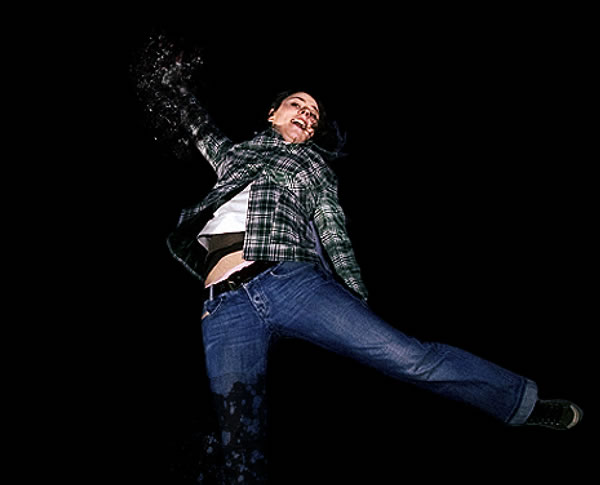
Step 8 — Clouds
Add a new layer on top of the others. Select white for the foreground color and black for the background. Then go to Filters > Render > Clouds. Now select the Lasso Tool. Set the feather to 20px, and select an area around the girl. You will have a selection like the image below. After that, just go to Layer > Layer Mask > Reveal Selection.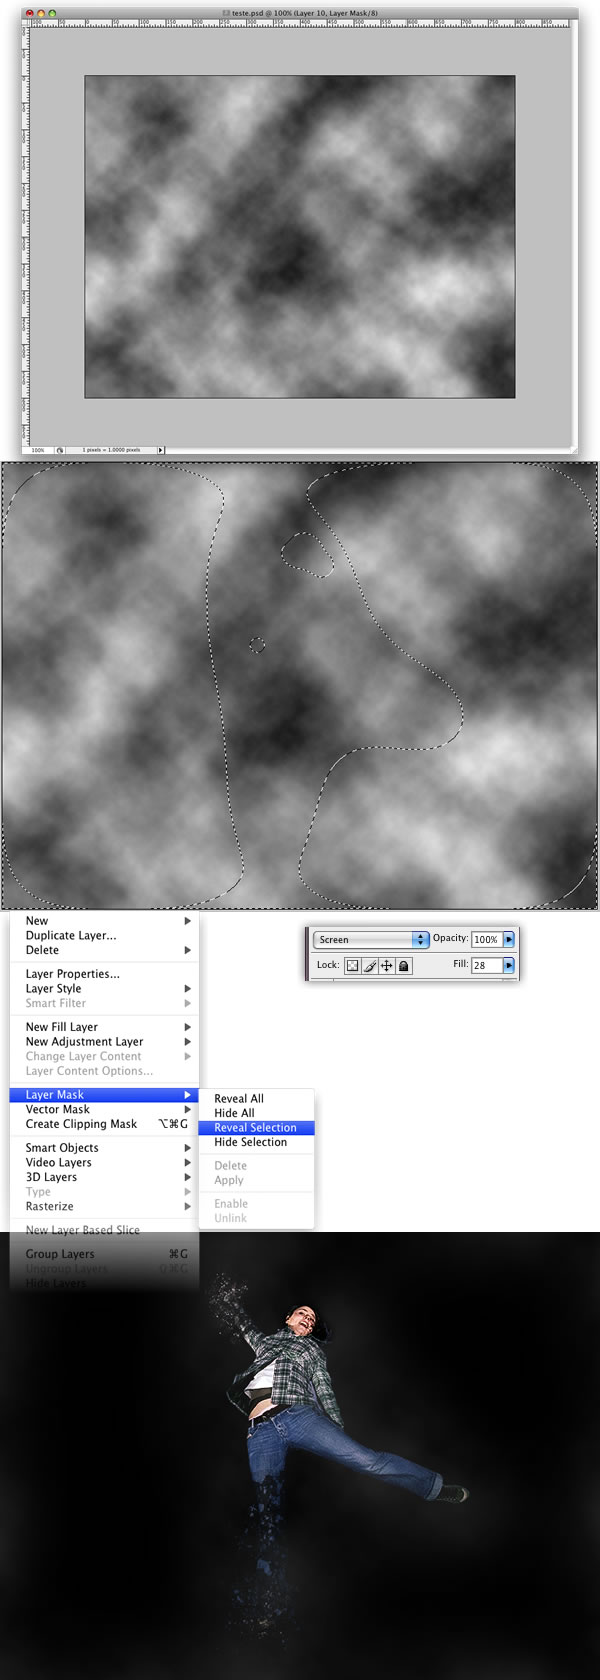
Step 9
Double-click on the clouds layer to open the Layer Styles dialog box. The first thing to do here is use Screen for the Blend Mode and use 28% for the Fill Opacity. Then select Gradient Overlay. The Blend Mode will be Color Dodge this time with 55% Opacity. Use the same colors as the image below.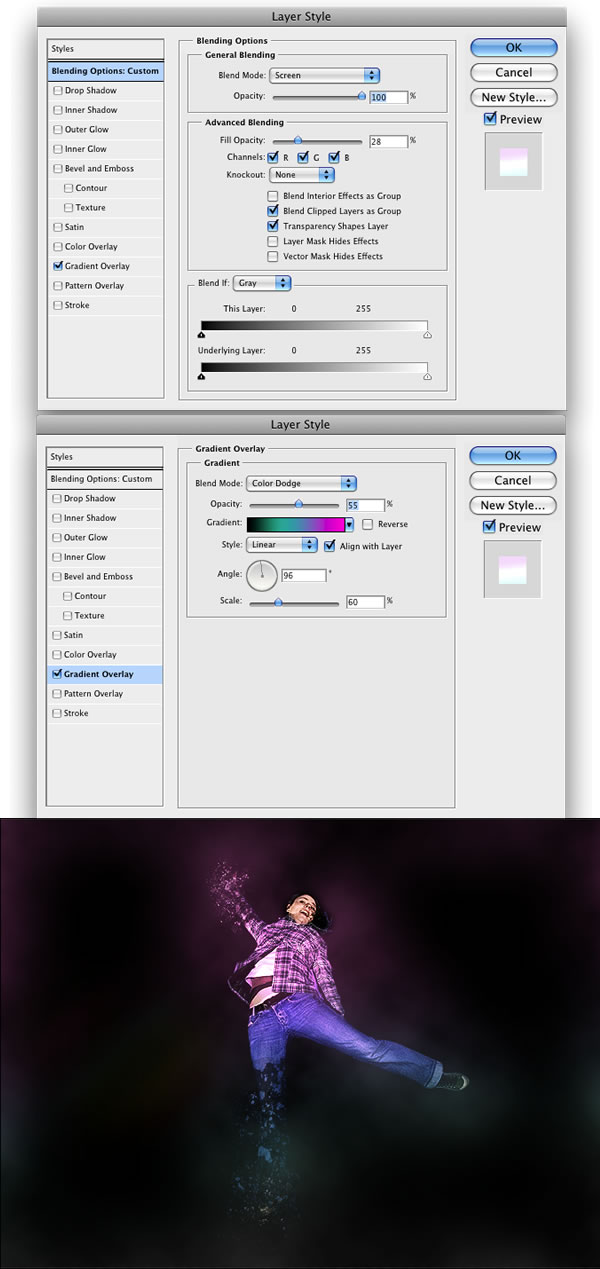
Step 10 — Lighting Effects
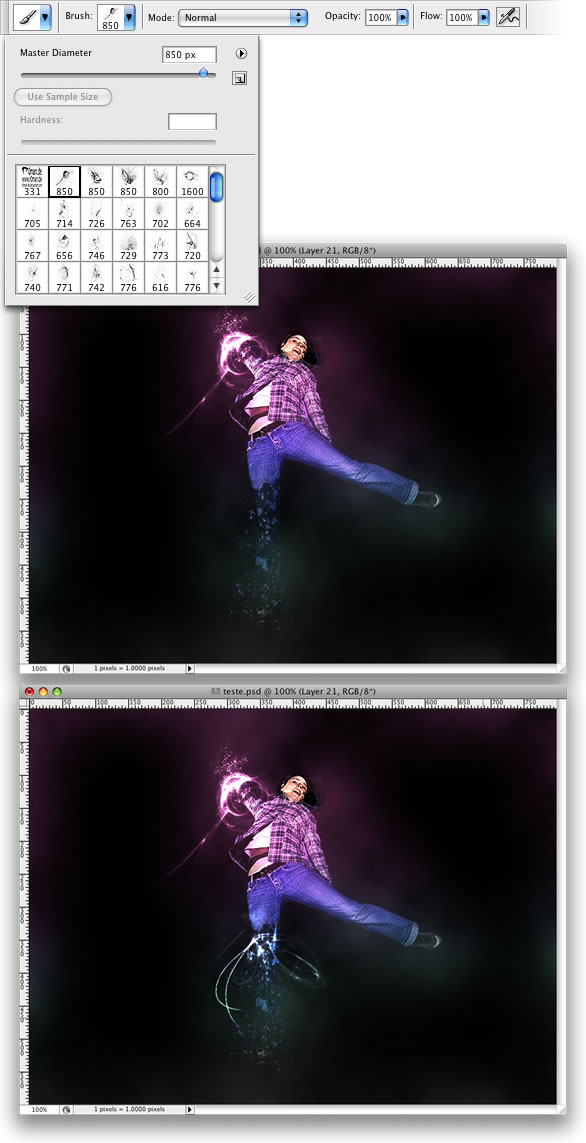
I used some brushes to create the light effects. You can find them here: http://r0man.de/kostenlose_brushes_photoshop.htm.Create a new folder above all the other layers, rename it to “lights” and change the Blend Mode to Color Dodge. Then select white for the color and the Brush Tool. Test some brushes to see the result. Create a layer for each effect.
Step 11
Create a new layer inside the “lights” folder. Select the Rectangular Marquee Tool (M), making sure the Feather is 0px. Create a rectangular selection. Then select the Gradient Tool (G). For the colors, use white for both start and end, but change the end’s opacity to 0. Then just fill the rectangle with the gradient like in the image below.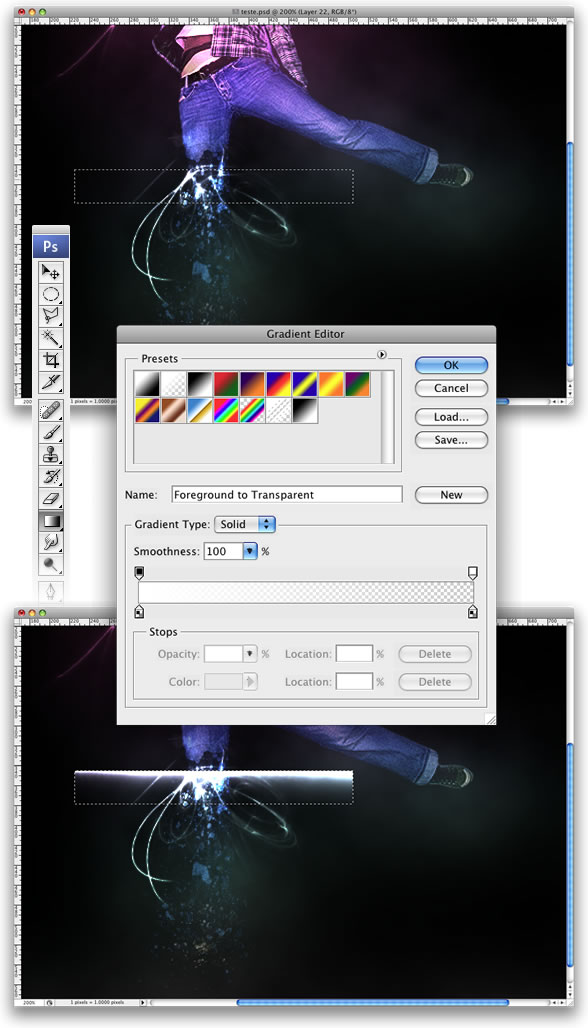
Step 12
Select the Elliptical Marquee Tool (L) and use 10px for the Feather. Create an elliptical selection like the image below. The just go to Layer > Layer Mask > Reveal Selection.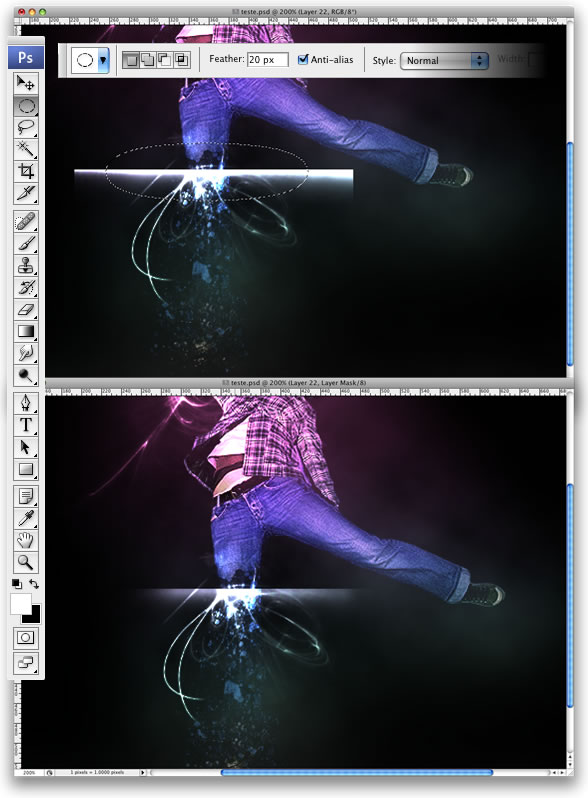
Step 13
Duplicate the layer and go to Edit > Transform > Flip Vertical. Then go to Edit > Transform > Scale and reduce the height only. After that, just group these two layers. You can create more lights just by duplicating the group, rotating, and scaling it.
Step 14 — Illustrator
In Illustrator select the Pen Tool (P) and create two curved lines To do that, hold the button every time you click to create a curved point. Use 0.5pt for the stroke weight. After that, select the Blend Tool (W) and click over one line and then on the other. To change the blend properties, just double-click on the Blend Icon. Choose Specific Steps for the Spacing and use like 50 steps. Copy the blend.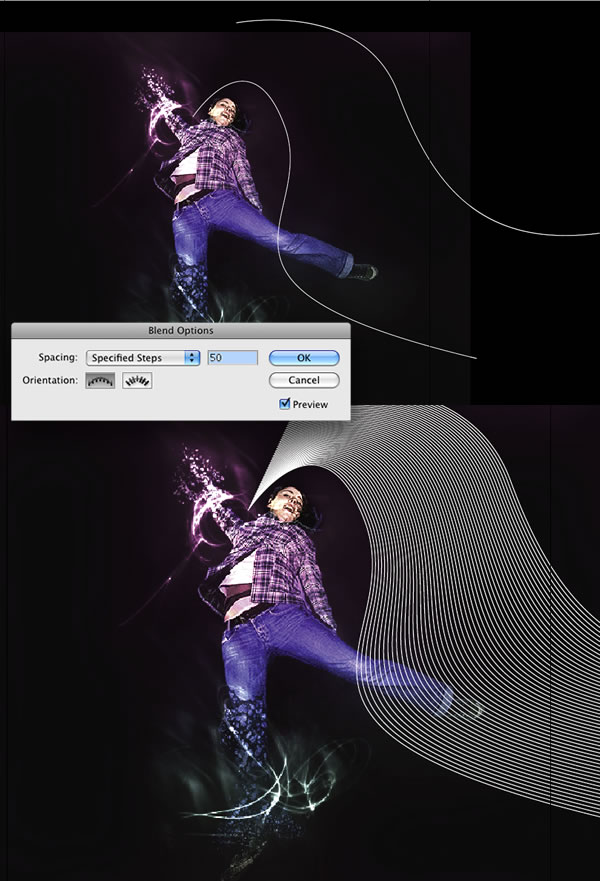
Step 15
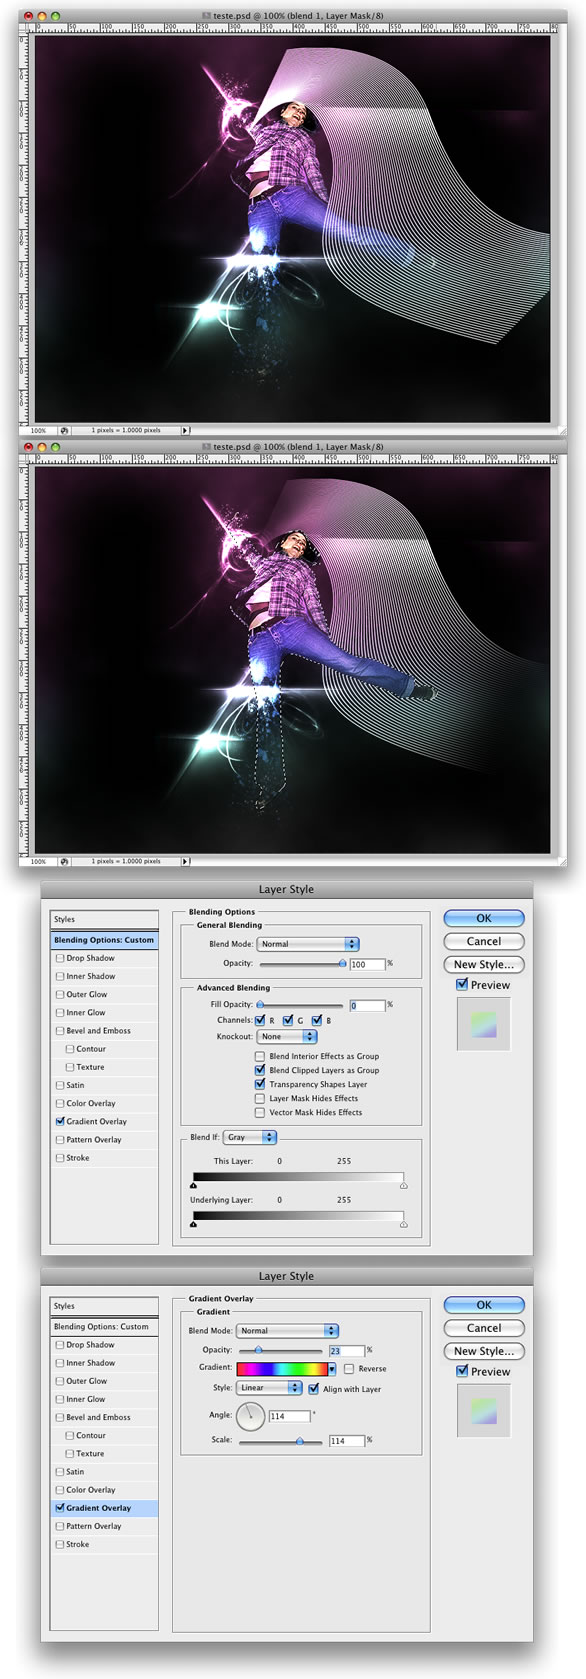
Back to Photoshop, paste the blend over the girl. After that, select the girl’s body. To do that, just click over the girl’s icon on the layer palette holding Cmd (mac) or Ctrl (PC), which will select only the girl’s body. Then go to Layer > Layer Mask > Hide Selection. That will hide the parts of the blend that are in front of the girl.Open the Layer Style dialog box, change the Fill Opacity to 0 and select Gradient Overlay. Use 20% for the Opacity and use the rainbow colors, like in the image below.
Conclusion
There are lots of different ways to do the break-apart effect. I chose the one that was, in my opinion the fastest and easiest one. You can see that I spent more time creating the lighting effects than doing the break apart effect.
Title : Seriously Cool Photoshop Explosion Effect
Description : Final Product What You'll Be Creating Explosions are cool. Seriously cool. So when I received some e-mails asking about how to ...
Description : Final Product What You'll Be Creating Explosions are cool. Seriously cool. So when I received some e-mails asking about how to ...
0 Response to "Seriously Cool Photoshop Explosion Effect"
Posting Komentar